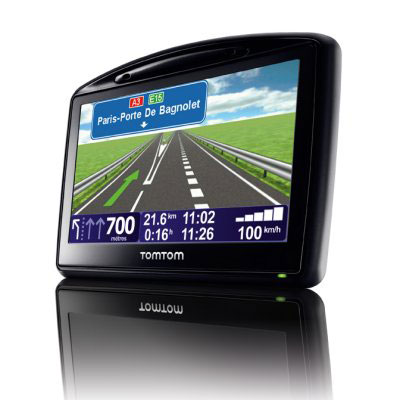
Screen calibration of a TomTom GO730 GPS
My TomTom GO730 decided to go on strike. The touch screen has suddenly decided to send the wrong values, so no command in the upper part of the screen can be selected, regardless of where you press the screen. Planned obsolescence or technical problem? This problem is apparently common and a simple method exists to revive your dear driving-companion.
 My GPS did not suffer any shock or prolonged stay in a wet environment, so at first I thought it was a technical problem with the contacts of the screen. I followed one of the many youtube videos explaining how to access the bowels of the beast, but after disassembly / reassembly, the problem was still present.
After some research, I found a way to recalibrate the screen.
Before you begin, you should know that Tomtom GPS have several startup modes: cold-start and hot start.
The cold-start is a complete start from a powered-down state. If you press again the power button, the GPS will then go to sleep by turning off the screen. Press once again the power button to hot-start it, which actually corresponds to the wakeup.
To start, turn on your GPS by pressing the power button at the top right and hold until the following screen appears.
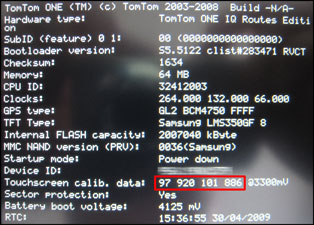
Amongst the various informations, the characters framed in red in the picture represent the default calibration values. The touch surface is a resistive matrix, therefore a pressure creates resistances in the X and Y axis. The internal GPS program is then able to determine the point where the pressure was applied. Take note of these values, they will serve us later in the article.
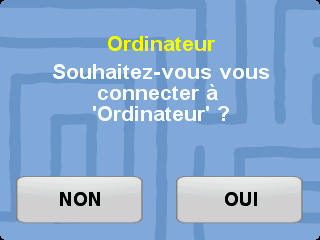
If you arrive at boot directly on the route planning is that you’re in the hot-start mode. To access the cold-start mode, turn it off again by pressing the power button and plug the USB cable. Then turn on the GPS and it should connect directly to your computer. If you get the following screen, press “YES” (or the point on the screen corresponding to it). If you cannot press “YES”, repeat the process until it starts in cold-start, which will automatically connect it to your computer.
Once your GPS is connected to your computer, two new drives should appear. One is the SD card containing your maps, the second is the internal memory of the GPS and contains the firmware.
Explore the contents of the internal memory of the GPS and create a file named cal.txt at its root (or calib.txt for other GPS models). This file will contain the values of resistors necessary for the proper calibration of the screen.
Take back the calibration values noted above. In my case, they looked like this: 90 938 142 842 (Xmin Xmax Ymin Ymax).
The X axis does not seem to have been affected, only the Y axis must be recalibrated. As the top half of my screen was not available, I decided to take as Ymax_new value the point in the middle of Ymin and Ymax so 142 + (842-142)/2, which gives us 492, rounded to 490.
Introduce these values in the cal.txt in accordance with the following data inversion:
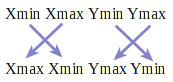
The contents of the file cal.txt should look like: 938 90 490 142 (no newline at the end!). Save the file and start your GPS screen, even if it is not perfectly aligned, it should react differently. For my part, I had to make four attempts before getting to the correct values of Ymax and Ymin which are finally: 938 90 500 80.
To refine your settings with precision, you can go to the route planning menu and use a flexible tip (like stylus or pen) to drag lines on the keyboard, checking out where it changes key. After a few iterations, you should get correct values corresponding to your device.
This is a recurring problem on the TomTom, which suggests a deliberate act of planned obsolescence.
Trackback from your site.